
How to Back an Embroidery Hoop with Felt
Once you have finished your embroidery, adding a felt backing is a lovely way to make the back of your hoop look neat, colourful and ready to display.
This step-by-step guide will show you how to back an embroidery hoop with felt using simple blanket stitch. It is a useful finishing method if you are making wall art, gifting a stitched hoop or just want the back of your work to look as pretty as the front.
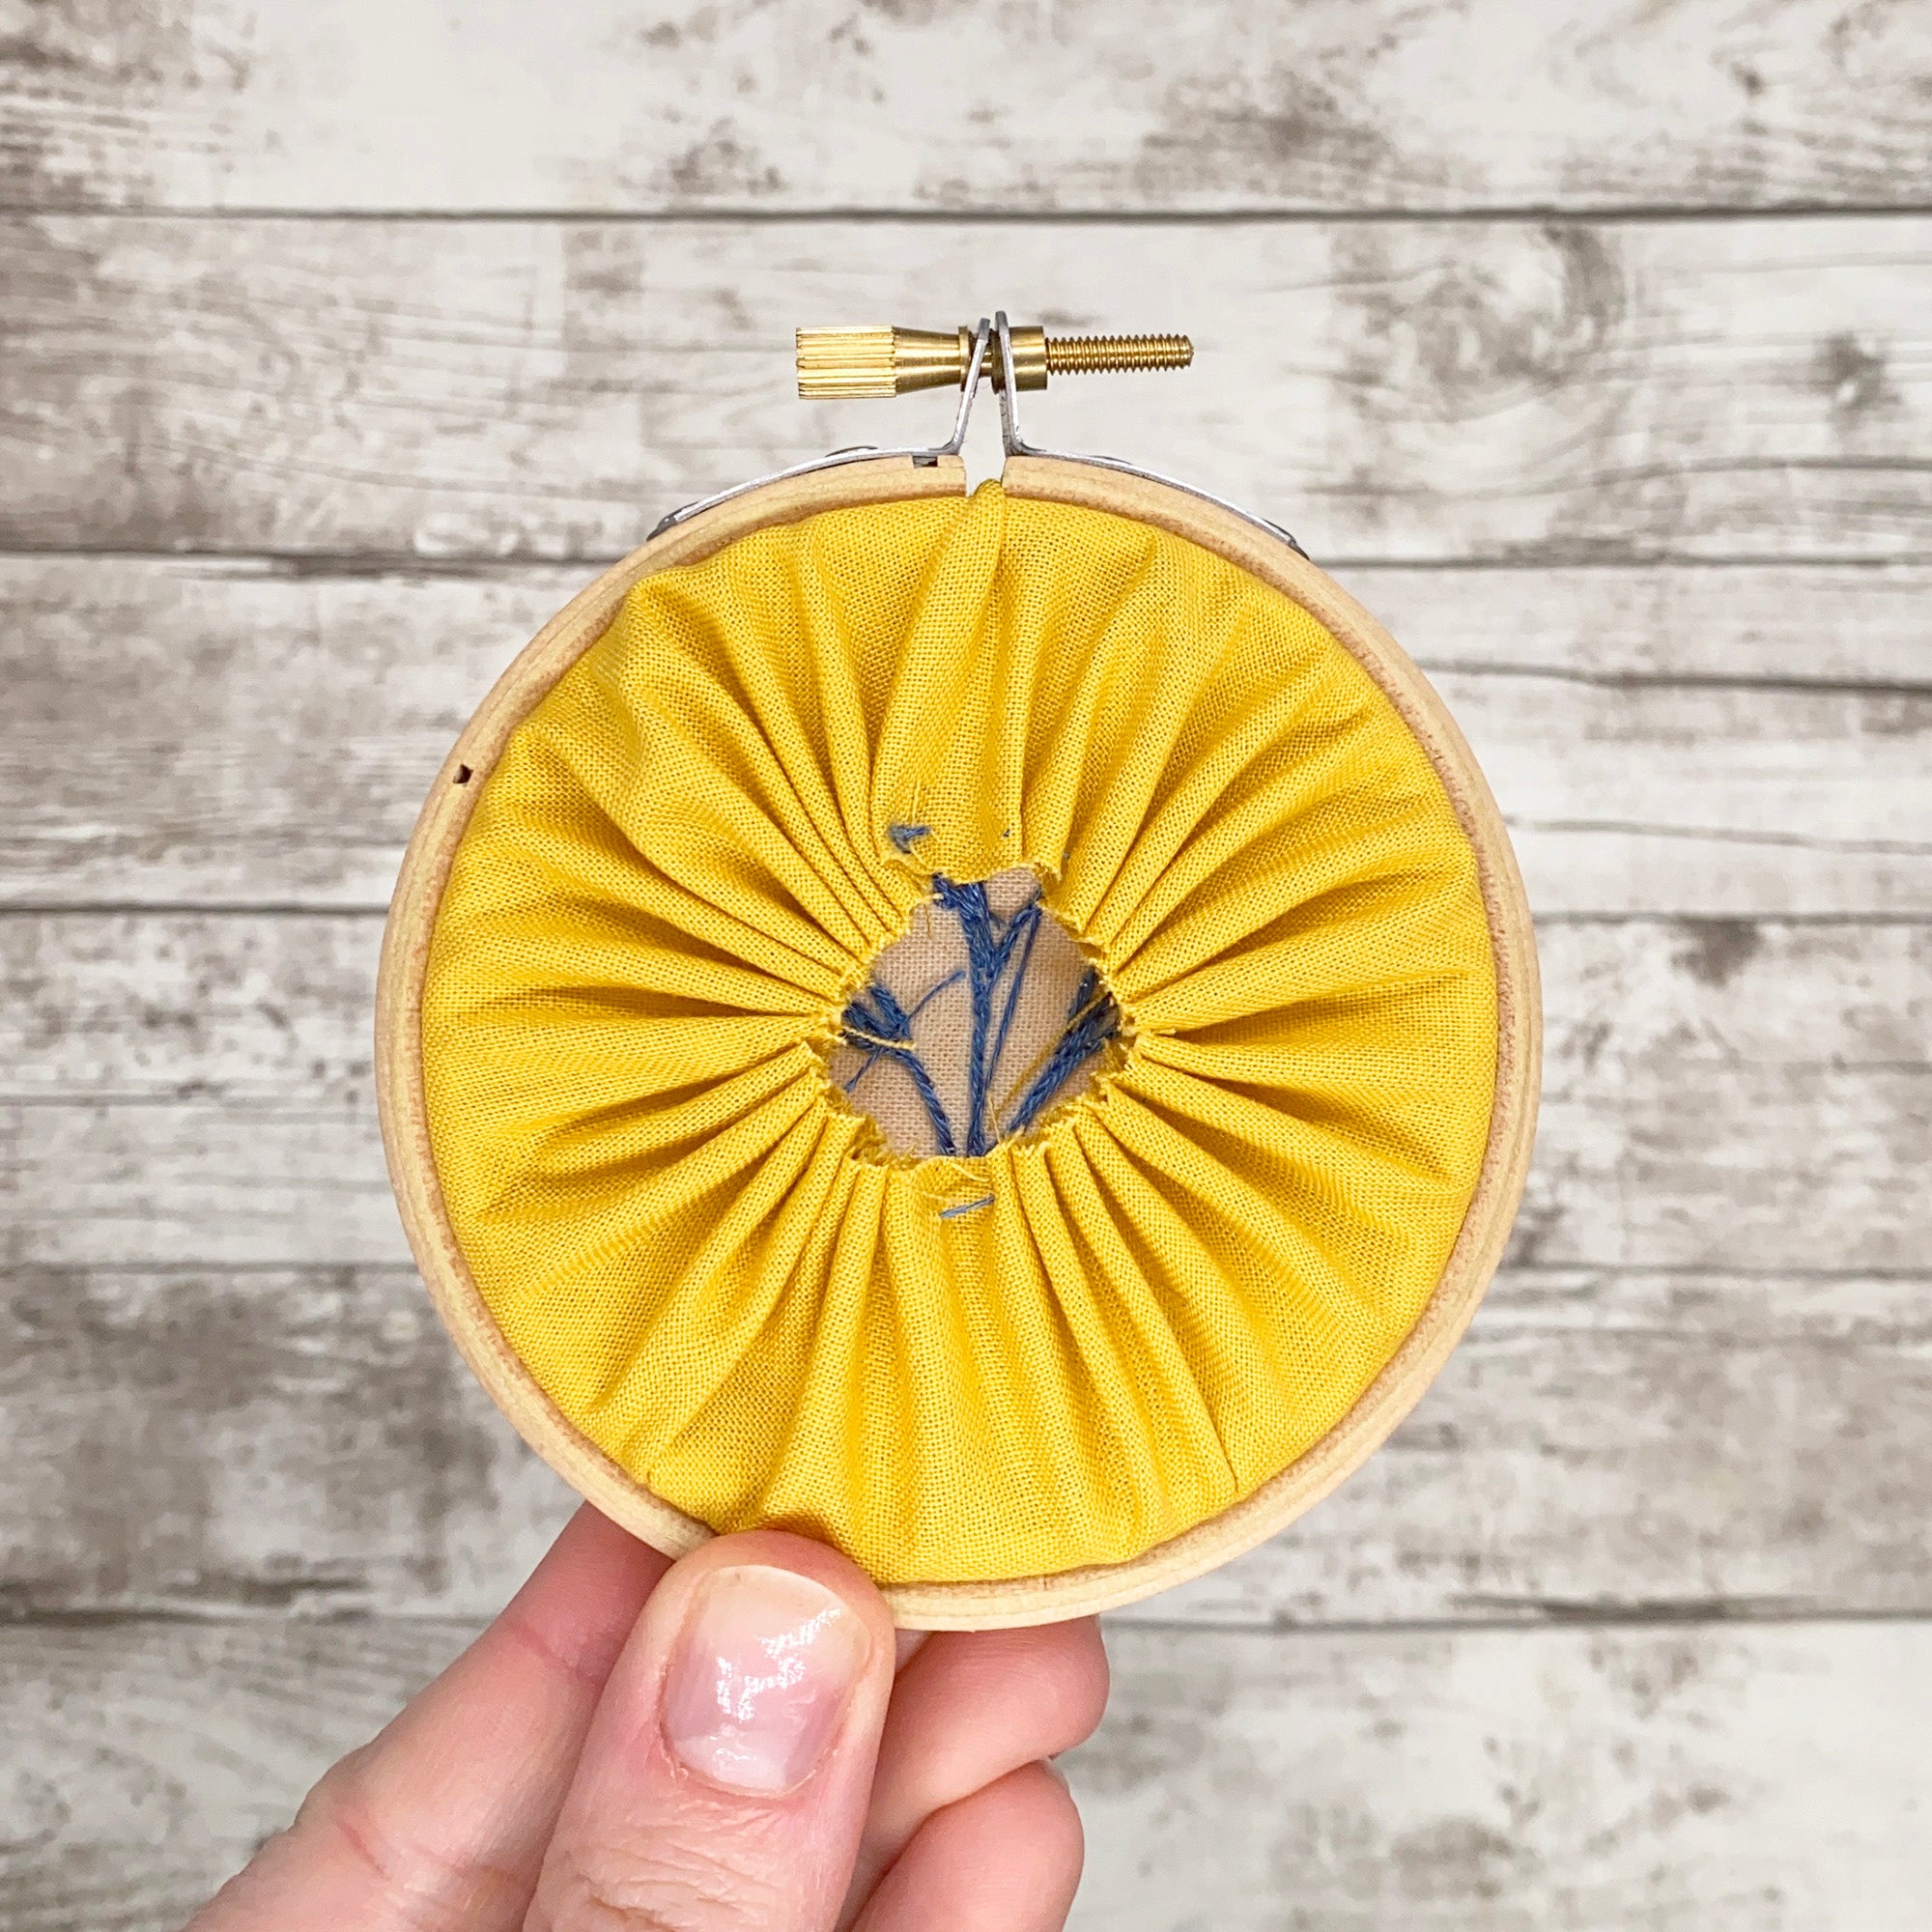
Before adding your felt, you will need to gather the excess fabric at the back of your hoop. If you have not done that part yet, start with my guide to backing an embroidery hoop, then come back to this felt finishing method.
You will need
- Your finished embroidery in a hoop
- A piece of felt, slightly larger than your hoop
- A pencil
- Embroidery thread
- A needle
- Scissors
Need supplies for your next embroidery project?
If you are finishing one hoop and already thinking about the next, these are handy places to start. Pick a complete kit if you want everything ready to go, or top up your tools and hoops for future projects.

Embroidery kits
Complete embroidery kits with the design, hoop, thread and instructions included.
Shop embroidery kits
Hoops and tools
Useful embroidery supplies for finishing, framing and starting new stitching projects.
Shop hoops and toolsHow to Back a Hoop with Felt Step-by-Step
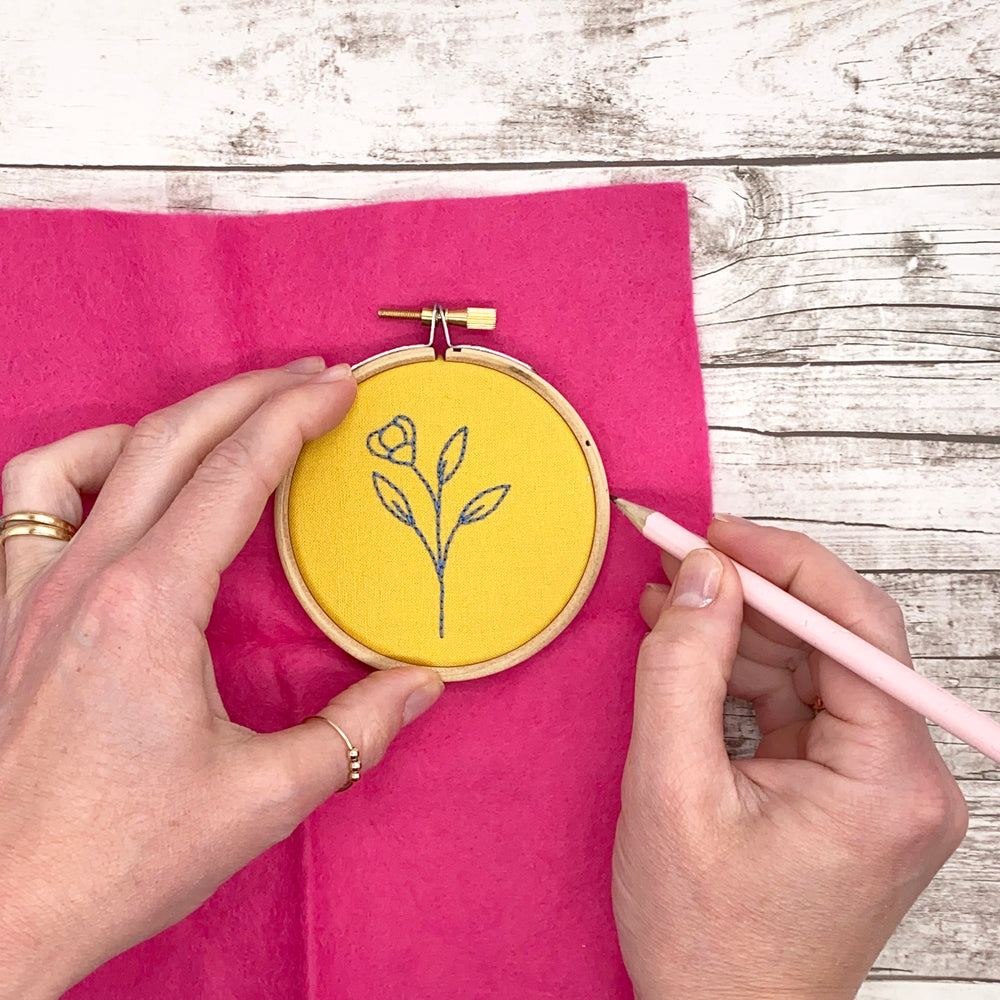
Step one: draw around your hoop
Place your embroidery hoop on top of the felt and use a pencil to draw around the outside edge.
I have used a bright contrasting colour for my felt backing, but you could also choose a colour that matches your embroidery thread or fabric.
Step two: cut out the felt circle
Cut out the felt circle along your pencil line. Place it over the back of the hoop and trim away any extra felt until it sits neatly inside the back edge.
The felt should cover the gathered embroidery fabric, while still leaving the wooden edge of the hoop visible.

Step three: start your thread
Thread your needle with three strands of embroidery thread and tie a knot in the end. If you need help with this, follow my guide to separating embroidery thread.
To hide the knot, bring your needle through the small gap in the gathered fabric at the back of the hoop, then out near the edge where the felt will sit.

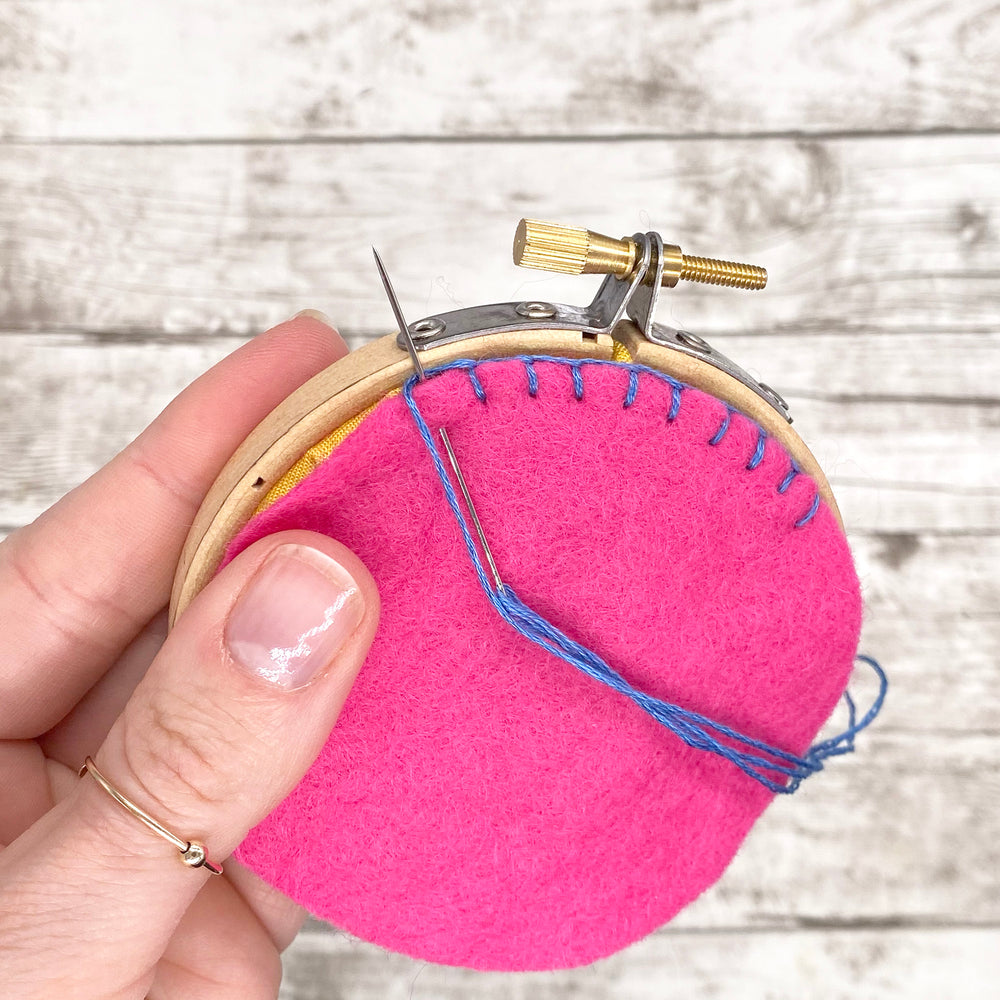
Step four: make your first blanket stitch
Lay the felt circle over the back of the hoop. Pass your needle through the felt and the gathered embroidery fabric, then pull the thread gently so the felt sits flat.
Move your needle along by about half a centimetre. Slide the needle diagonally through the felt and fabric, keeping the loose thread looped behind the needle. Pull the thread through to make your first blanket stitch.

Step five: stitch around the hoop
Continue working around the hoop, placing a stitch roughly every half centimetre. Each stitch should catch both the felt backing and the gathered embroidery fabric underneath.
Keep looping the thread behind the needle before pulling it through. This creates the neat blanket stitch edge around your felt backing.
Step six: keep the stitches even
Work slowly around the hoop, keeping the stitches fairly even as you go. Pull the thread snugly enough to hold the felt in place, but not so tightly that the felt puckers.
Continue until you arrive back where you started.

Step seven: tie off the thread
When you have stitched all the way around, tie the thread ends together securely at the back of the hoop.
Trim away any excess thread for a neat finish.

All done
That’s it, your embroidery hoop now has a colourful felt backing and a much neater finish.
This is a lovely way to finish embroidery that will be given as a gift, hung on the wall or displayed on a shelf.

More embroidery help
I hope you enjoyed learning how to back an embroidery hoop with felt. For more beginner-friendly tips, take a look through my beginners’ embroidery guides.


