
Difficulty Level: Medium
Project Length: Medium

To stitch this hand embroidery personalised hoop you will need:
- Lazy May 'Geometric Alphabet' embroidery pattern set (transfer)
- 30cm x 30cm (12"x12") white fabric
- DMC thread in the following colours; 798, 554, 470, 827, 899, 307, 721, 151, 552
- 8" Embroidery Hoop, Needle, Scissors
If you are new to embroidery you can find a guide to the basics, including equipment and getting setting up here. You will find guides to all the stitches mentioned in this pattern here .
Preparation
Transfer your pattern to the fabric following the instructions on the packet.
Stitching Notes
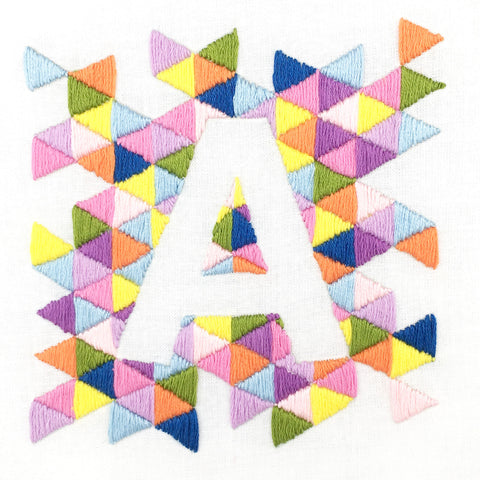
Each of the triangles in this pattern is stitched using satin stitch to fill the entire triangle. You will see in the illustration above that I have not included the letter outline, this is because each letter takes up a different space on the pattern, simply complete the triangles up to the the outline of your chosen the letter as shown on the next page.
You can use the diagram below to guide you in the placement of your colours or place them randomly.

To begin choose any one of the 9 colours in this pattern and cut an arms length of thread, select and separate three of the six strands of thread.
Then thread your needle and tie a knot in the free end. All the triangles in this pattern are stitched using satin stitch keeping the stitches vertical.
To stitch your first triangle push your threaded needle up through the fabric at the corner of any triangle (1), as shown in the diagram below. Pull all the thread through to the front and then push the needle back down through the opposite corner (2).
Now push your needle back up though the fabric and triangle outline, next to the very first stitch you made and repeat the stitch (as shown below 4 and 5).
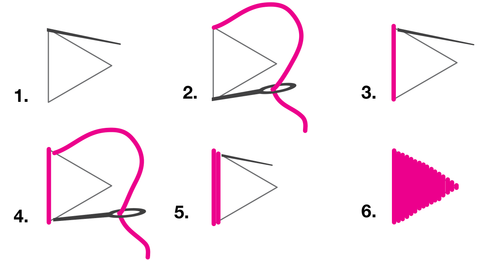
You will see you are making lots straight single stitches that begin to cover the fabric in the shape of a triangle. This stitch is called satin stitch. Once you have completed a triangle, pull your thread though to the back of the fabric remove the needle and tie a knot to secure it. Then move to the next triangle and repeat the process.
TIP: when stitching this pattern make sure you do not get any loose ends of thread behind the letter as it will show through when you frame your stitching, the best way to avoid this is to tie off your thread after every triangle and trim the ends short.
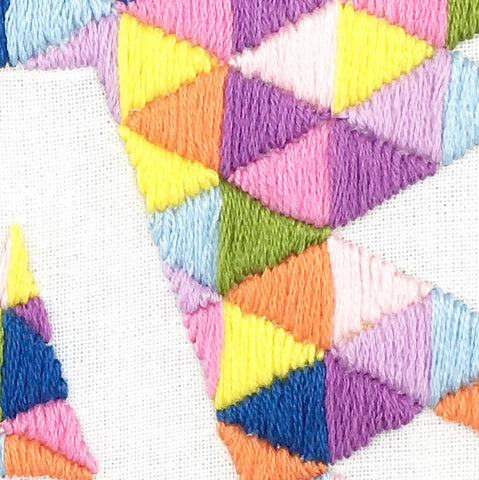
As you start to work around the edge of the letter fill in the shapes with satin stitch in exactly the same way, see diagram on the right, keep the stitches vertical and making sure you stop at the outline of the letter. You do not need to outline the letter in anyway, the satin stitched triangles will make up the outline when completed.

Once complete your hoop is ready to hang on the wall. Check out my guide to finishing an embroidery hoop if you need some tips.
This project was stitched using 'Geometric Alphabet' Embroidery pattern, please click here.


